Git Started: A Quick Introduction to Git & Github
Github is the most popular version control web apps available where developers share open sourced code and collaborate on projects. It is an excellent resource to find examples for real world projects when learning a new technology, and also for picking up cool coding tricks and practices by looking at other people’s code. I call it the Google for developers. It’s a developer’s playground.
In this tutorial, I will show you the top 7 most common Git commands in 11 steps that will “git” you started. With these following commands, you’ll be able to upload projects to Github, manage different versions on your local machine, and collaborate with a small team:
- git init
- git add <file-name>
- git commit -m “<message>”
- git push origin <Branch Name>
- git remote -v
- git remote add origin <Repo URL>
- git branch
Tools Needed
- Git
- Github Account
- Terminal / Command Line Prompt
NOTE: I also want to preface this tutorial by stating what I am writing this from the perspective of a Mac user. If you are using Windows command line be sure to adjust the terminal commands to suit Windows such as using backslashes instead of forward slashes when defining file paths.
Step 1. Install Git
Visit https://git-scm.com/download/
There you can Download at install Git for your operating system. Make sure you download the command line tool and not the GUI.
You’ll need to configure Git to know your name and email. Use the same username an email that you create for your Github account. Open your Terminal application and type:
$ git config –global user.name "YOUR NAME"
$ git config –global user.email "YOUR EMAIL ADDRESS”
Step 2. Create a Github Account
Visit Github.com, and signup for an account. You should be able to sign up for a free account.
Step 3. Add SSH keys to Github
Github has an excellent tutorial on how to do this. Follow their steps at this link, then continue to step 4 of my tutorial:
https://help.github.com/articles/generating-a-new-ssh-key-and-adding-it-to-the-ssh-agent/
Step 4. Create a remote repository on Github
In the upper right corner of the page, click the + icon, and then click New Repository.
![]()
Name the repository RashadGitTutorial.
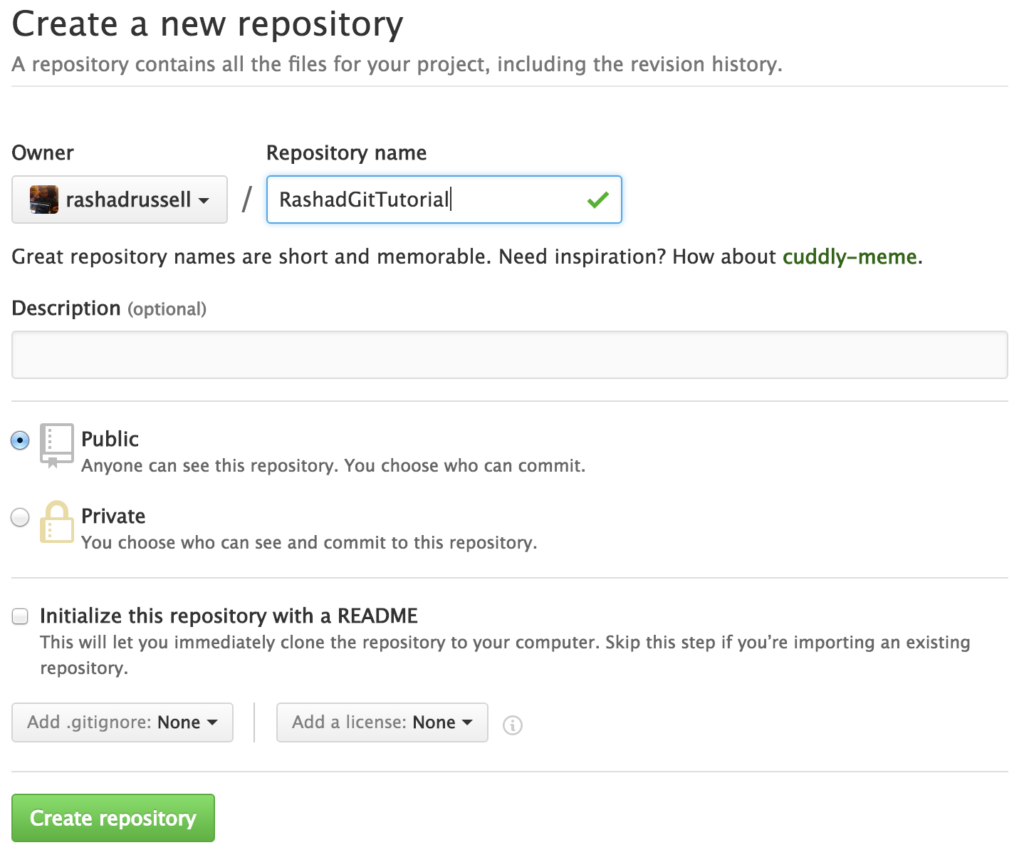
When you are finished, click the Create Repository button.
Step 5. Create a directory on your local machine
Create a new directory anywhere on your computer, and name it GitStarted.
Then, in your terminal app, navigate to that directory.
This will be the directory you will work from.
Step 6. Initialize a Git Repository on your local machine
In your terminal app, make sure you have navigated in to the directory you just created in step 4, and initialize Git inside of it with the following command:
$ git init
Step 7. Create a file called README.md and add content to it.
In a code editor of your choice, create a file called README.md, and add some content to it. Then, save that file in the GitStarted directory you created in step 4.
Step 8. Create a new directory and create a new file in it.
Create a new directory inside GitStarted and name it TestSubDirectory.
Step 9. Connect your local repo to your remote repo
In your terminal app, make sure that you are still navigated to the root of your local git initialized directory (a.k.a repository a.k.a repo), GitStarted. Now you need to connect your local repo to your remote repo (a.k.a the repo you created on Github.com).
You can check to see if you are already connected to a remote repository by using the remove command the verbose option:
$ git remote -v
You should see nothing. Now we need to add a remote repo to our local repo. Go back to your Github.com page, and click the SSH button next the URL input box. Copy that URL.
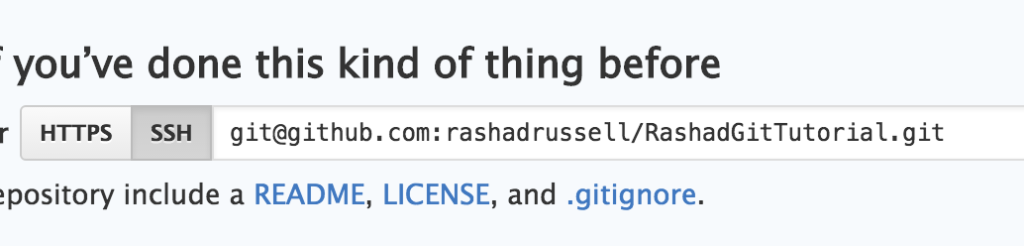
$ git remote add origin git@github.com:<YOUR_USERNAME>/RashadGitTutorial.git
If that command didn’t work, go back to your Github page, click the HTTPS button, copy that URL instead, then paste it at the end of the above comment instead.
Step 10. Add your changes to staging
We made several changes to our local repo that we need to commit to our remote repo: we created a file called README.md, and we created a sub directory called TestSubDirectory. We want to push these two to our remote repo, but first we need to stage our changes. Staging is just Git jargon for “choose changes to be upload.” You can check all the available changes that need to be added to staging by checking the status of your local repo:
$ git status
The files in red are the ones that can be added to staging. You can add them to staging with the add command:
$ git add README.md
$ git add TestSubDirectory
Step 11. Commit your changes
Now, your changes are staged, and ready to be sent to your remote repo. Before we can send them to the remote repo, we need to commit our changes that have been saved. Committing is just Git jargon for “save staged changes, and prepare to upload.” You need to use the commit command and supply a commit message as to summarize your changes:
$ git commit -m “Our first commit. Git quick start tutorial.”
Run git status again to see what all changes have been committed. Notice the changes you added are no longer red but green.
Step 12. Push Your changes.
We have now made it to the grand finale. You are now ready to push your first project to Github. It is always good practice to check the status of your Git repo before you push just to make the the files that you want on Github are all there, and to make sure files that you do not want are not there. Run another git status.
All is well. Now push your committed changes to Github:
$ git push origin master
Voilà! There you have it. You have now pushed your first project to the web. Wait! I know what you’re thinking. What’s with the origin master stuff? Technically, you could have just ran git push, but I’m leaving a cliff hanger for another tutorial to cover a very important and fundamental concept in Git called Branches.
Origin refers to your remote repo. Adding origin to a git push is a way to explicitly specify where do you want to push your changes. In the case of this tutorial, your origin refers to the url at your remote Github repo.
Master is referring to what branch you want to push to. In short, branching is a Git feature that allows you to manage different versions of the same file, hence the name version control software. You can see what branch you are currently on in you local repo:
$ git branch
Notice that the terminal returns master because you are on the master branch. This is by default, and the master branch is the primary branch that should always host the most complete and functional code. If you are collaborating with a team, and want to fix a bug or create a new feature, you’d create a new branch to start a new line of work, and merge those changes back into the master branch once you are done. We’ll cover that in another tutorial.
Thanks for viewing, and I hope this helped you get started. In the future, I will be making a Github tutorial series that will go more in-depth in how to use Git and Github, and cover topics such as Branching, pull requests, collaboration, etc.